SEAMLESS PLASTER SOLUTIONS
3 Pro Secrets for a Flawless DIY Plaster Finish
This guide will unlock three key secrets, drawn directly from the "Organic Finishes DIY Interior Plaster Application Guide," that professionals understand instinctively. These are the insights that will empower you to move beyond fear and turn that dream of a beautiful plaster wall into your next successful DIY project.
Shawn Reeder
11/29/20254 min read
3 Pro Secrets for a Flawless DIY Plaster Finish
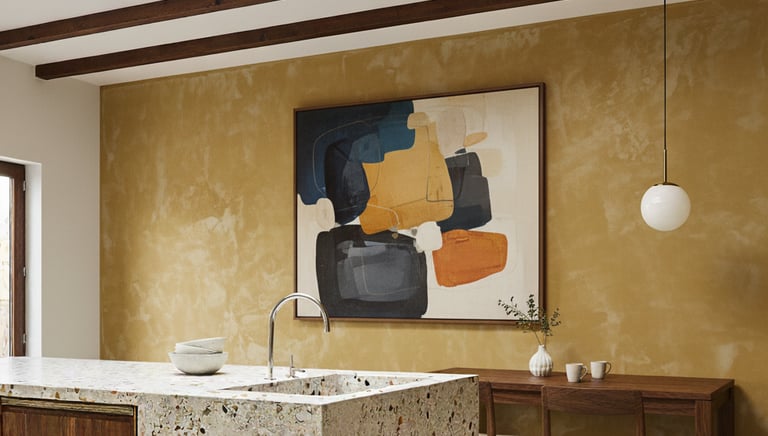
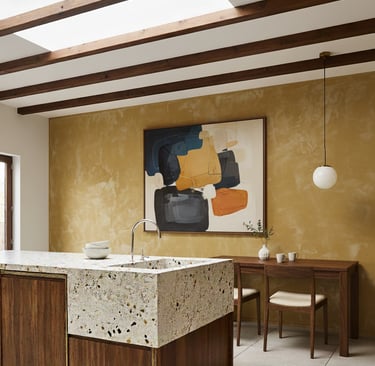
There’s something undeniably captivating about an artisanal plaster wall. The subtle texture, the way it plays with light, and the organic depth it brings to a room can transform a space from ordinary to extraordinary. It’s a finish that feels both ancient and modern, a true mark of high-end design. Yet for many DIY enthusiasts, it remains a dream, locked away by one major obstacle: the fear of getting it wrong. The thought of ending up with a lumpy, uneven disaster is enough to send anyone running back to the safety of a paint roller.
But what if the difference between an amateur attempt and a professional result wasn't about some innate, magical skill? What if it came down to understanding a few crucial, often-overlooked steps? Achieving a flawless plaster finish is less about raw talent and more about process and patience. It's about knowing when to act and, more importantly, when to step back.
This guide will unlock three key secrets, drawn directly from the "Organic Finishes DIY Interior Plaster Application Guide," that professionals understand instinctively. These are the insights that will empower you to move beyond fear and turn that dream of a beautiful plaster wall into your next successful DIY project.
--------------------------------------------------------------------------------
1. The Art of Restraint: Letting the Plaster Do the Work
One of the biggest mistakes beginners make is trying to force the plaster into submission. The instinct is to keep working the surface, smoothing it over and over again, believing that more effort will lead to a better result. The professional secret, however, is restraint. The application guide makes this crystal clear in its instructions for the leveling stage: "Do not overwork."
This advice is counter-intuitive but critical. Plaster is a chemical mixture that needs to set at its own pace. When you continuously trowel the surface, you can pull moisture out too quickly, disrupting the curing process. This can lead to a weak bond, cracks, and a messy, overworked texture instead of the smooth, solid base you're aiming for. The goal of the base coat isn't perfection; it's to create a stable, evenly absorbent foundation for the delicate finish coat that comes next.
Base Coat: Apply with steel trowel at 10-15 degree angle. 1-2mm thick.
Leveling: Smooth out base coat. Do not overwork. Allow to firm up (not dry).
--------------------------------------------------------------------------------
2. Patience is a Tool: Mastering the Art of the Pause
Professionals treat plaster not as a material to be applied, but as a chemical reaction to be managed. This mindset shift is everything, and it's most visible in how they treat time. Here's a mantra I tell all my students: "You can't rush chemistry." A plaster project is punctuated by essential waiting periods, and rushing or skipping them is a recipe for failure. The guide highlights several non-negotiable pauses that are crucial for a successful outcome.
First, after mixing the plaster, you must let it "stand." This allows the water to fully hydrate the mix, ensuring a consistent and workable consistency. Next, after applying and leveling the base coat, you must allow it to "firm up (not dry)." This creates a stable but still receptive surface for the finish coat to bond to. Finally, and most critically, you must wait for a "full cure (24-48+ hours)" before applying any protective sealer. These pauses aren't suggestions; they are integral steps that ensure the strength, adhesion, and ultimate durability of your walls.
--------------------------------------------------------------------------------
3. The Job Isn't Done When It's Dry: The Crucial Final Steps
For many DIYers, the project feels complete once the plaster is on the wall. For a professional, this is where the true artistry begins. They see the process as two distinct layers: a foundational base coat and a cosmetic finish coat. The "Finishing" stage truly begins with the application of that second, thinner coat, which perfects the surface and protects your work for the long haul.
First comes the Finish Coat. The guide instructs you to "Apply thinner second coat. Use different strokes for texture. Fill low spots." This is your opportunity to correct any minor imperfections from the base coat and create the canvas for your final look.
With the finish coat applied, you can focus on Appearance. This is where you decide on the final effect. For a sleek, modern look, the source is very specific: for a smooth finish, you burnish with a clean trowel as the plaster firms to "polish for shine." The timing and the clean tool are key. If you prefer a more rustic or textured look, you can use "sponges, brushes, or specialized tools" to create unique patterns on that finish coat before it fully cures.
Finally, and arguably most importantly, comes Protection. The last step is "Sealing" the wall with a "breathable sealer or wax" after a full cure. This is the step that too many beginners skip. A proper sealer protects your beautiful new surface from dirt, scuffs, and moisture, making it durable and easy to clean. Just as importantly, a "breathable" sealer allows any residual moisture within the wall to escape, preventing long-term issues. Skipping this step leaves your hard work vulnerable and compromises the longevity of the finish.
--------------------------------------------------------------------------------
Conclusion: Your Walls are a Canvas
Achieving a professional-grade plaster finish is entirely within your reach. As we've seen, the secrets aren't about complex techniques but about a thoughtful approach. Success is built on restraint during the application, the patience to honor the material's chemistry, and a dedicated finishing process that perfects and protects your work. It truly is a "Professional Grade, DIY Friendly" project when you follow the right steps.
Shawn Reeder
Owner
Organic Finishes
shawn@organicfinishesllc.org
Now that you know the secrets, what wall in your home is ready for a stunning transformation?